Beside the implanting color theory, you – future candidates or customers should know “How many steps for a microblade procedure”.
STEP 1 – DRAW & MEASURE.
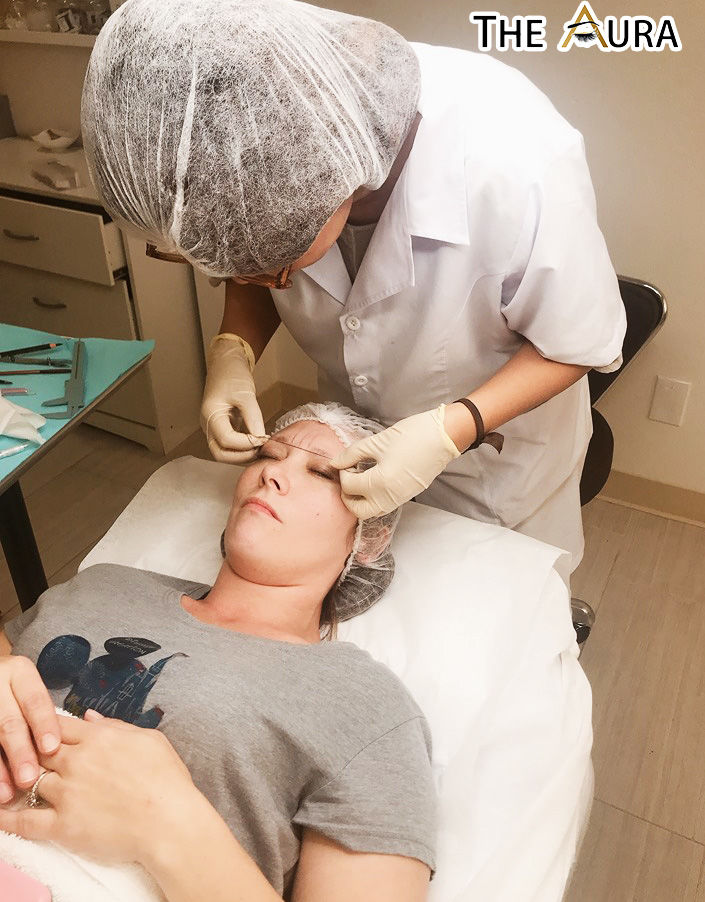
Do a visual measuring first, then draw on the eyebrows for your client to see. After receiving the approval, measure the eyebrows and draw guidelines.
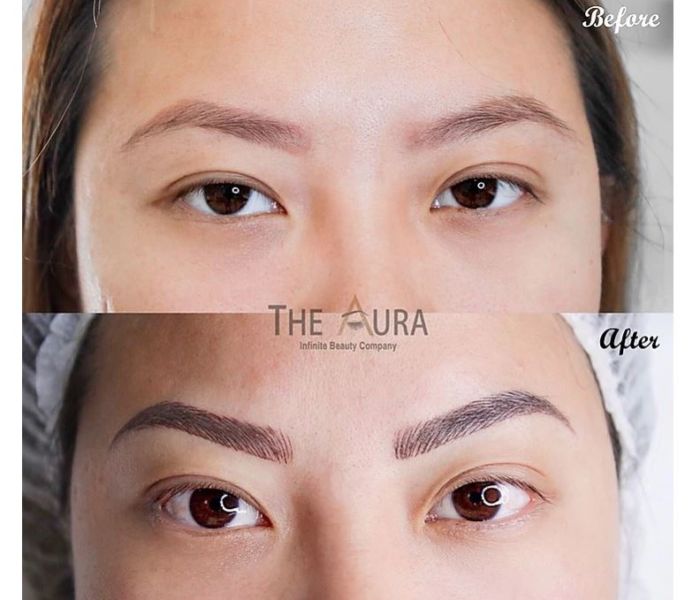
- Draw on and fill in the eyebrows, the shows the client the shape and how they will look with color (showcasing where the hair strokes will be placed), as seen in the picture.
- Following the outside shape of the eyebrows that were drawn on, draw a guideline around where the hair strokes will be placed.
- If necessary, and with the client’s permission, tweeze the eyebrows where needed. This will help you see the shape of the eyebrows. Stand in front of a wall mirror with your client to view the eyebrows. After the client has given their approval, it is important to measure the eyebrows to ensure they are even.
STEP 2 – DRAW THE OUTLINES.
- Once you start implanting the color, you do not want to compromise the beautiful eyebrows you have perfectly shaped. Outline each eyebrow with a skin-safe marker that won’t easily wash off during a procedure. As the measuring pencil lines wipe off, the marker outline will remain. This will help ensure the color is implanted evenly in the intended area. Surgical marker work well because they don’t easily wipe off.
- With a marker, outline the eyebrows by placing dots around the exact shape of how they have been drawn on.
- Use a marker to draw a solid line to outline the shape where the hair strokes will be implanted.
STEP 3 – APPLY TOPICAL ANAESTHETIC.
- Using a cotton swab, apply the topical anaesthetic prior to a procedure on both eyebrows. When applying topical anaesthetic, avoid touching the outline that was drawn on with a marker to prevent causing the outline to dissolve. This is a good time to review, confirm the procedure with the client and prepare the eyebrow color(s).
Note: It’s important to keep your client as comfortable as possible during the procedure. Let your client know you can re-apply the topical anaesthetic if they are uncomfortable.
GET YOUR BIG GIFTS and MORE DISCOUNT HERE!

Your health and beauty – Our happiness!
Contact us for beauty care: (714) 989-6268
———————
After countless sleepless nights, refining ideas, remodeling the facility, and designing class content, Master Ann Nguyen has finally made her dream come true with The Aura Beauty Academy, specializing in the art of Permanent Makeup and Microblading. We, The Aura Beauty Academy ensures that anyone who participates in the course will leave feeling confident in their future as a professional artist.
THE AURA BEAUTY ACADEMY is a beauty company that provides microblading, permanent cosmetic make-up, and provides licensing approved training in Westminster – Orange County California.
🏢 Address: 14550 MAGNOLIA ST, SUITE 206, WESTMINSTER, CA 92683
☎ Hotline: (714) 989-6268 / 833-THEAURA (833-843-2872)
📧Email: [email protected]
🌐Instagram: @aurabeautycompany
🌐Website: aurabeautytraining.com
https://theaurabeauty.com/5-crucial-tips-to-implant-color-in-microblade


